


How to Migrate from ClickMagick to AnyTrack
On this page
ClickMagick is a solid link tracker. If you run a small blog with a handful of affiliate offers and mostly organic traffic, it does the job. But the moment you start scaling, adding networks, moving into paid traffic, or trying to get your conversions into Google Analytics, the manual setup starts to fight you. Cloaked links, master tracking links, hand-built SubID formulas, and session-cookie plugins all need to stay in sync, and one wrong token silently breaks attribution.
AnyTrack takes a different approach. Instead of routing every click through a redirect, it works as a tag, like Google Analytics. One script on your site detects your affiliate links, keeps the original ad click attached across the whole session, and streams enriched conversions to your ad platforms and GA4 automatically. This guide walks you through switching over without losing data or taking your tracking offline.
Before You Start: You Don’t Have to Cut Over in One Day
The safest migration runs both tools in parallel. Keep ClickMagick live while you set up AnyTrack, compare the numbers for a few days, and only retire the old setup once you’re confident. Nothing breaks, and you keep a reference point to check AnyTrack against.
Here’s what the move looks like end to end.
Step 1: Install the AnyTrack Tracking Tag
Add one lightweight script to your site’s <head>. On WordPress you can paste it with a headers-and-footers plugin or your theme settings; you can also deploy it through Google Tag Manager. That single tag replaces ClickMagick’s web tracking code and starts collecting sessions, clicks, and events right away.
See the install guide for platform-specific steps.
Step 2: Keep Your Cloaked Links (and Drop the Formulas)
This is the part that surprises people coming from ClickMagick. You don’t rebuild your links, and you don’t have to abandon ThirstyAffiliates or Pretty Links.
AnyTrack’s AutoScan crawls your pages and recognizes your affiliate links. AutoTag then appends each network’s correct click ID parameter automatically (subid, afftrack, sid, and so on) the moment a visitor clicks. You keep your raw affiliate links, and there are no ?s1=product-category-postID formulas to write or maintain. If you cloak links, you can point AutoTag at them with the link’s rel attribute.
What you can delete from your workflow:
- Master tracking links, one per merchant
- Hand-written SubID token formulas for every placement
- Session-cookie plugins to keep parameters alive across pages
Step 3: Connect Your Affiliate Networks
In AnyTrack, add each affiliate network and paste its postback URL into the network’s dashboard. It takes about a minute per network. From then on, when a sale fires, the network sends the conversion back to AnyTrack, matched to the original click.
AnyTrack has native integrations for 90+ affiliate networks, so most of the parameter handling is already configured for you.
Step 4: Connect Your Ad Platforms
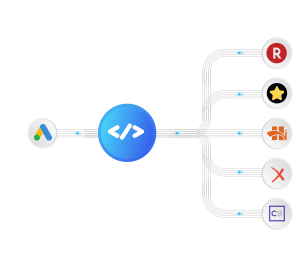
Connect Google Ads, Meta, TikTok, or Microsoft Ads. AnyTrack sends your conversions to each platform’s Conversion API in real time, enriched and deduplicated, so the bidding algorithms optimize on actual sales instead of waiting on manual conversion imports. This is the part ClickMagick keeps inside its own dashboard. For the Google side, the playbook to track affiliate commissions back to your Google Ads campaigns covers this wiring end to end, through to Smart Bidding optimizing on EPC.
Step 5: Sync Google Analytics
Connect GA4 with a one-click Google login. AnyTrack immediately starts streaming conversions into your GA4 property server-side via the Measurement Protocol. Because the data carries your UTM and campaign values, your affiliate revenue lands in GA4’s standard reports already attributed to the right channel: Organic Search, Paid Search, Social, and Referral.
For an SEO blog moving into paid traffic, this is usually the whole reason to switch. Your content revenue and your ad revenue finally sit in the same report.
Step 6: Verify, Then Retire ClickMagick
With both tools running, open the AnyTrack Event Log and dashboard and confirm:
- Clicks and outbound clicks are firing on your affiliate links
- Conversions arrive when a network sends a postback
- Conversions reach your ad platforms and GA4
- The numbers line up with what you’d expect from ClickMagick
Once you’re confident, remove ClickMagick’s tracking code and links. AnyTrack deduplicates conversions before sending them, so running both briefly won’t double-count once you’ve cut the old setup.
What You Gain
| Job | ClickMagick | AnyTrack |
|---|---|---|
| Affiliate link setup | Cloak links + SubID formulas | AutoScan and AutoTag, automatic |
| Session persistence | Web tracking code or cookie plugin | Automatic, first-party |
| Google Analytics | Its own dashboard | Native GA4 via Measurement Protocol |
| Ad platform optimization | Manual, dashboard-bound | Real-time Conversion API |
| Affiliate networks | Manual per network | 90+ native integrations |
Ready to Switch?
The honest version: if your setup is small and static, there’s no urgency. But if you’re adding networks, scaling spend, or moving from SEO into paid, the manual work that’s fine at five links becomes a liability at five hundred. Once the tag is live, the playbook to track affiliate commissions back to your Facebook Ads campaigns is a natural first project, rebills included.
Start your free AnyTrack trial, or see the full ClickMagick vs AnyTrack comparison first.

Laurent Malka is the Co-Founder of Anytrack. He was born and raised in Switzerland, and now lives and works in Israel. He is a serial entrepreneur with over 15 years of experience in marketing and business development. Laurent has been a panelist and speaker at numerous digital marketing events including SEMrush and IG Affiliates. He prides himself on his ability to connect the dots across disciplines, industries, and technologies to solve unique challenges.
Related posts
 Laurent Malka
 Google Ads Affiliate Tracking: Why It Breaks and How to Fix It

 Ori Carmely
 The Affiliate Marketing Tools That Actually Matter in 2026
 Laurent Malka